
Today I am sharing my recommendations for the things you’ll need to get started in papercraft and the things I would be lost without. For instance, when left my craft caddy at home before a live Create & Craft TV demonstration and had to be rescued by a fellow crafter (forever in your debt Carly Duff) the items listed below were the things I made sure I borrowed and had to hand.
Whether you’re a cardmaker, scrapbooker or off the page papercrafter, there are a few essential items that you’ll need to have at your disposal. Within each section I have included links to previous posts with tips and projects using the item.
I intend to work on a follow up post looking at other items I have invested in to be able to create more complex projects, but for now it’s back to basics.
Adhesives
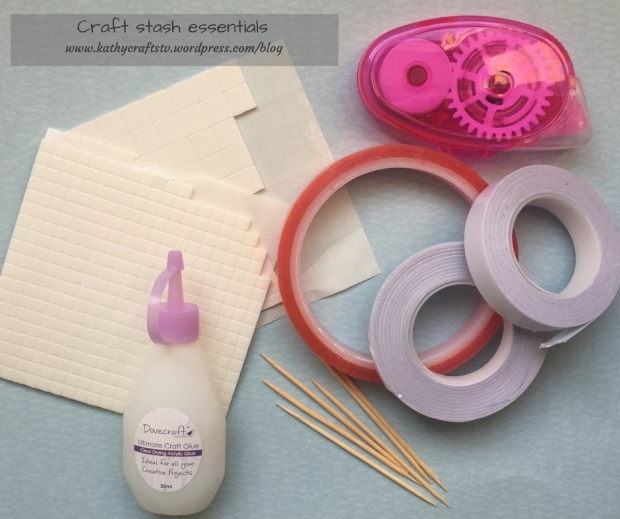
Craft stash essentials – adhesives
- For matting and layering, it can help to use a repositional glue or a wet glue that doesn’t set immediately so that you have time to adjust the layers so that they all line up.
- Foam pads add dimension and it’s useful to have a range of sizes. You can also get foam tape that you can cut to size, perfect for fixing larger areas or die cuts.
- Double sided tape is very useful for applying to the reverse of papers prior to die cutting as you can create your own stickers; it’s much quicker, easier and cleaner than applying glue to each individual die cut. There’s a quick tutorial here.
- Permafix tape is ultra strong and is great for dimensional crafting such as these pinwheels.
- You will need a fine glue for fixing intricate die cuts. Dovecraft Clear Drying Ultimate Craft Glue is ideal but you will need to apply it sparingly. I find a dollop on a piece of scrap paper then applied to your die cut using a cocktail stick is a great way to make sure you don’t have seepage or excess glue on your project.
- Glue runners are essential for speed crafting (when you’re just about to leave the house to visit the in-laws and realise it’s your husband’s nephew’s wife’s aunt’s birthday and you have to craft a card!)
- When scrapbooking make sure you choose adhesives that are suitable and acid free so that they won’t degrade your pages and images over time.
Essentaial tools
Every crafter should have these basic items, it’s the law!
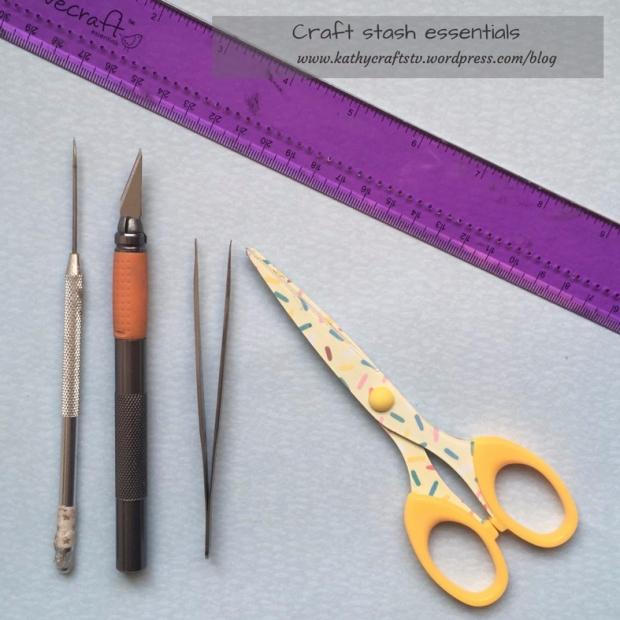
Craft stash essentials – tools
- Scissors – for fussy cutting, snipping ribbon, cutting adhesive tapes, I’d advise having at least three pairs: one for your desk, one in the stationery pot as a spare and the third lost underneath the craftermath of papers and embellishments.
- Craft knife – again for cutting around images, trimming papers down for matting and layering. A craft knife can be more precise than scissors and far easier to cut a straight line – with a ruler, obviously (see below) – but remember to change your blades regularly or risk cutting becoming difficult and papers being ruined.
- Ruler – a metal edged ruler is essential for crafters as you will wear down a plastic ruler when using in combination with a craft knife. This will lead to a wonky ruler, imperfect mats and layers and will also ruin your blades quicker. Of course you could use a trimmer but I see this as an investment; cheaper ones will blunt easily and become useless or cost you a firtune in replacement blades. The most effective ones are a considered purchase so not for this ‘essentials’ post.
- A pokey tool – absolutely vital if you’re die cutting as you will need to release the papers by pushing the tool through the tiny holes in the dies. A pokey tool is also indispensable when unclogging the nozzles on your glues!
- Tweezers – placing small glued die cuts onto your project will be much easier with tweezers and you’ll be able to be more precise in your placing. I also reach for my tweezers when applying mini gems and pearls. It’s much easier to slide the adhesive gems off the backing sheet with tweezers than using your fingers and again, makes placing them on your finished project more precise.
Stamping essentials
 Stamping is a really quick and easy way to add sentiments or create backgrounds to your cards and scrapbook layouts. Don’t forget you can mask your stamps making them even more versatile. You will need:
- Clear stamps – I find these easy to use because you can see where you are stamping. Many of the clear stamps you will find available can be coloured in making your handmade item a work of art too.
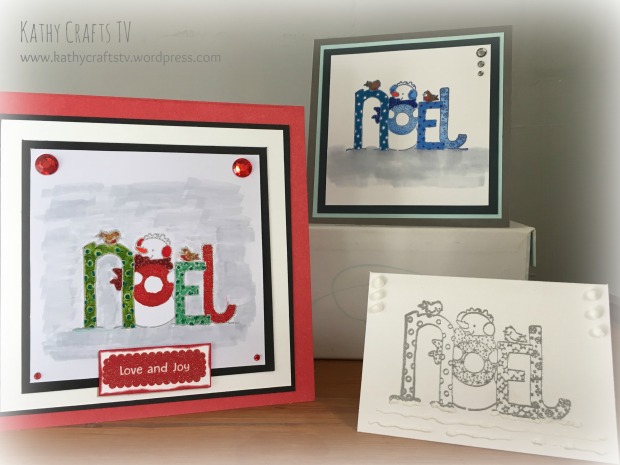
Stamped cards using the Helz Cuppleditch Wonderland stamp
Also, think about the different ways you can use your stamps, for example, pressing them into clay like these tree ornaments.
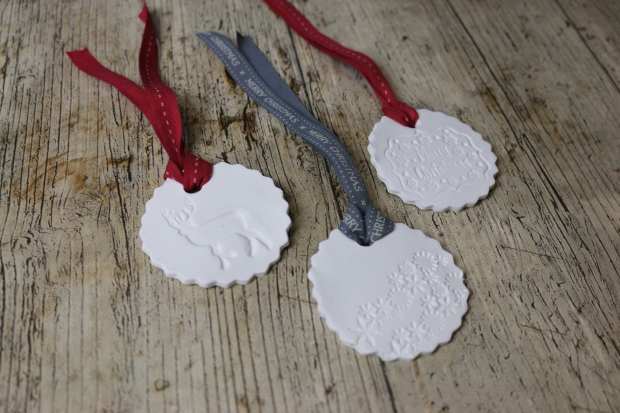
Stamped clay Christmas tree decorations
- Acrylic block – If you are using clear stamps you will need to use an acrylic block to hold the stamp whilst you print the image onto your project. Clear stamps adhere to the acrylic blocks easily and are simply peeled away when you have finished. If your stamps don’t stick easily anymore, wash them in a heavily diluted mix of washing up liquid and water and leave to air dry.
- Ink Pad – you can create really different cards and projects just by using different coloured inks. I like to use colours that match the papers I am using and I am also a fan of heat embossing powders, but more of that in a future post. Just make sure you’re using the right ink. If you want to create an ink wash then you will need a watercolour ink. Pigment inks take longer to dry so are great for heat embossing but can easily smudge if not left long enough. Permanent, quick drying inks are available for impatient crafters (like me).
- Wooden alphabet stamps – I’ve covered these little gems before in a previous post, theyre such good value and perfect to have in your stash to personalise your makes.
Die Cutting Essentials
 Die cutting hints and tips probably need a separate blog post to themselves so I’ve made a note to self to do that, but in the meantime, here’s the topline:
- Die cutting machine – from manual to automatic, compact to mighty, there is a massive selection to choose from. Either way, your budget will largely determine which die cutting machine you purchase, but from personal experience, mini machines are great for having on your craft desk for speedy projects but a large electronic machine can help with larger, more intricate dies.
- The dies themselves – pictured are a few essentials that I would definitely recommend, things like nesting shapes, alphabets and bunting as you will use them time and time again, whatever papers you choose. There are so many dies available on the market now, you really can find almost any shape in a die. I would advise looking for one with magnetic storage included, like First Edition dies, as it’s much better value than having to purchase additional magnetic sheets and storage cases. You’ll also find that you get a comprehensive number of dies on a theme, for example eight dies on a garden theme. That said, for a specific project, smaller dies, like Dovecraft dies, are perfect – think about that time you visited the llama farm, wouldn’t a llama die be just the most amazing addition to your scrapbooking kit for a layout with photos from the trip?
- The papers you choose to die cut with are also worth taking a few minutes to think about. Some cheaper dies will struggle to cut through things like glitter card or heavyweight cardstock. If you’re having problems, adding a piece of paper or card over the bottom plate can help by acting as an additional shim.
So that’s the absolute basics, but they also come with a warning. Once you’ve tried papercrafting you’ll soon become addicted and find there are many more items that you just have to purchase, essentials like new pretty papers, new stamp designs, washi tapes, ribbons, buttons, stickers…….I could go on!
What are your crafting essentials? I’d love to know what you can’t live without.

I agree with all of these! My craft knife isn’t used so much now but I can’t get rid of it. I find certain dies are essential-especially nesting sets and basic greetings. I rarely buy very specific dies now, tending to stick to multi purpose ones, but I am on a budget. My Cricut machine was a good purchase too, as I can cut so many things in different sizes. I wouldn’t have bought it as a beginner though as it wasn’t needed. Another essential for me is card kits, so I can whip up a last minute card in seconds by choosing things from the kit that will definitely match. Great post!
LikeLiked by 1 person
Thank you. I agree on the Cricut and papercraft kits too. I’ll be posting about those in future posts.
LikeLike
Ooh fab, I’ll keep an eye out!
LikeLiked by 1 person
Don’t hold your breath! This post was six months in the making 😆
LikeLike
A great post! I use nearly all the same things as on your list, which did make me smile. In addition I also couldn’t be without my folding knives (if that’s the right term) the ones you use for scoring papers, or in my case making sure my cards are folded flat in the middle so I don’t get ridges in my fingernails 😁 And baby wipes…they clean everything from my stamps to my calligraphy pen nibs 😂.
LikeLiked by 1 person
Of course!! Baby wipes. They really are essential! I have three packs as just like my scissors they have a habit of hiding from me!
LikeLiked by 1 person
I have a small guillotine which is used every craft session. My Dovecraft paper trimmer which was only £5 is also very useful. It is identical to another big brand, except the trim is a nicer colour, but the other is double the price.
I’d add a cheap gluestick to the adhesives. It’s great for running down lines of tape to allow a few seconds glide which means you can alter the positioning. Also, a scrap of craft foam is handy to squeeze glue onto so you can run small embellishments such as sentiments along the glue. You can also stick a pin in it to use for unblocking ink bottles or dab the tip in glue and use it to pick up tiny gems, dab them in the glue, and stick in place.
LikeLiked by 1 person
Fab tips May!! I do indeed use a trimmer sometimes but find when I’m making so many cards I do wear the blades down very quickly. Love the glue tips too!
LikeLike
Really interesting read.
I agree with all your essentials, and would add in card blanks. It can be fun to make a card absolutely from scratch, but I tend to find I get really carried away with the details and run out of oomph for the bases and have a pile of card fronts waiting for a day I get round to making something for them to sit on. I enjoy adapting the blanks I have and probably try more shapes than I’d make from scratch, a whoopsed up card blank is very little work, and I can pinch the unaffected card for die cutting or stamping, but if I’ve put more effort in to start with I grump!
My Scan’n’Cut has become invaluable, but I don’t think it is a necessity as such. It’s like my kitchen mixer, I could do things without it, but it makes everything so much quicker and easier.
LikeLiked by 1 person
I agree! Card blanks are essential. When I have to make up to 40 samples for a show, it makes it much easier and quicker. I don’t use them all the time but am glad they’re there when I do! I also have a Cricut which I think is essential but I know it’s a big outlay if you’re just starting out.
LikeLiked by 1 person